Security camera effectiveness depends heavily on where and how you mount your camera after purchasing one. Your newly installed $200 camera, positioned above the garage, reveals a severe flaw when it overlooks tree branches and is struck by the late afternoon sunlight. The high-tech device now seems nothing more than a stationary paperweight.
Successful surveillance with a security camera requires proper alignment of the direction and a stable installation position, regardless of the camera’s performance quality. A suitable security camera mount becomes crucial because it decides your camera’s visibility range, stability, and lifetime duration, mainly in external locations dealing with environmental conditions.
This article will identify security camera mount options and important consideration points, followed by professional recommendations for novice mistakes. We need to transform your security camera into its functional protective role.
What Is a Security Camera Mount?
Security camera mounts are the essential component of your surveillance system. The security camera mount refers to the bracket combined with the arm supported by a base that secures your camera position. Stability is the crucial base that upholds everything in an infrastructure, similar to how a house requires such support.
Mounts do three critical jobs:
- Stability: Maintain camera steadiness whenever wind or rain occurs and during accidental physical shocks.
- Angle Control: The lens position should cover important areas such as entrance points, blind spots, and driveways.
- Security: Security cameras’ functionality improves when thieves find it challenging to reach them or tamper with their equipment.
Different cameras—like bullet, dome, or PTZ (pan-tilt-zoom)—need different mounts. A dome camera could benefit from a ceiling mount, whereas a bullet camera aligns well with wall brackets.

Types of Security Camera Mounts
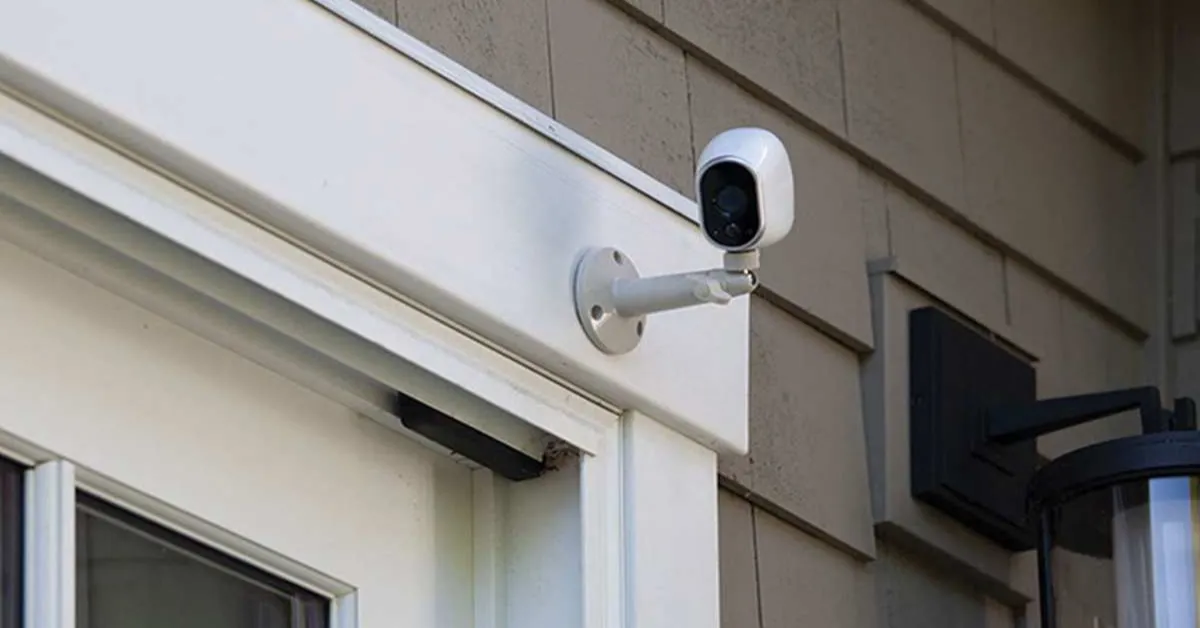
1. Wall Mounts
- Ideal for indoor/outdoor use, front doors, and backyards.
- Pros: Installation through essential tools adds flexibility while the mount functions alongside most camera types.
- Cons: Limited vertical adjustment; not ideal for wide coverage.
The wall mount is the preferred choice for people who build things themselves. Security mounts function similarly to a multi-purpose Swiss Army knife because they provide easy installation with clever adjustable angles for multiple kinds of cameras. The Type of security camera mount I prefer serves its purpose well in outdoor spaces because it allows perfect focus on critical zones where packages are dropped.]
2. Ceiling Mounts
- Ideal for: Dome cameras, offices, entryways, or rooms with high ceilings.
- Pros: The overhead wide-angle view from a discreet design makes tampering less likely.
- Cons: Drilling the ceiling becomes necessary during installation, and subsequent adjustments become more challenging.
When mounted to ceilings, these surveillance systems offer broad overhead observation, perfect for extensive indoor monitoring areas. The system will work fine as long as the ceiling material (drywall, concrete) is strong enough to support the weight.
3. Pole & Corner Mounts
- Ideal for: Pole and corner mounts meet the needs of extensive outdoor areas and building corner enclosures.
- Pros: These devices provide complete vistas and position cameras elevated and safe from tampering.
- Cons: Fixing this mount requires robust hardware, making its installation challenging.
My assistance in helping my friend obtain property with pole mounts resulted in the best system for seeing expansive views of roads or open fields.
4. Magnetic & Suction Mounts
- Ideal for rentals, temporary situations, and tests that need precise directional adjustment.
- Pros: Users need not drill the system; it maintains portability and offers simple position adjustments.
- Cons: Not weatherproof; unreliable long-term.
Magnetic and suction mounts function similarly to mounting training wheels. These work well for people living in apartments, although they cannot replace a permanent security system.
5. Adjustable Swivel Mounts
- Ideal for: The PTZ camera requires this mount and spaces such as garages, requiring adjustable coverage.
- Pros: 360-degree rotation, tilt/pan capabilities.
- Cons: Higher cost; complex installation.
Swivel mounts are the top performers in this group of security options. This device is ideal for extensive monitoring of backyards and retail shops.
Factors to Consider Before Buying a Mount
1. Camera Weight & Size
Check your camera’s specs! PTZ cameras that are heavy may damage plastic mounts, whereas lightweight doorbell cameras need brackets that match their dimensions correctly.
2. Indoor vs Outdoor Use
You should choose stainless steel or powder-coated aluminum materials when installing outdoor equipment. When selecting indoor mount solutions, you should focus on design, apart from exterior setups, because the equipment should match your interior look and style.
3. Viewing Angle Requirements
What type of area do you need to observe, between narrow passageways and extensive outdoor spaces? Door and floor angles benefit from ceiling mounts, yet focused areas work better with wall attachments.
4. Wall/Ceiling Material
Drywall? Use anchors. Brick? Grab masonry screws. Installing on vinyl siding? You should never use an exterior clamp design for interior drilling operations.
5. Installation Difficulty
You will need tools for specific mounts, but others can be installed without equipment. You should hire a professional if you lack experience with installation, since safety matters more.
6. Aesthetic & Design
No one wants an eyesore. Use low-profile mounts for living room applications, yet prefer black or gray-colored mounts when outdoors.
7. Power Source Location
Battery-powered? Easy. Wired? The mount should be placed next to power outlets with built-in cable organization features.

Bonus: Mounting Tips for Best Results
- Height Matters: Place security cameras at heights between 7 and 9 feet because installations below 7 feet are tempting to vandalize, but heights above 9 feet decrease the ability to recognize faces.
- Avoid Backlight: Cameras must avoid facing bright lighting or both sunrise and sunset positions.
- Test Before Locking In: The built-in camera application can help you check your view angle so tighten all screws after viewing.
- Secure Cables: Traffic and pest protection will be achieved using clips and conduits to secure wires.
Common Mistakes to Avoid
- Mounting Too Low: A level-mounted camera becomes visible to everybody.
- Ignoring Weather: Installation outdoors requires cameras to be designed for UV and water protection.
- Sloppy Cables: Exposed wires scream, “Cut me!”
- Wrong Materials: Materials like metal and reinforced polycarbonate will prove better than plastic, since plastic cannot withstand outdoor conditions.
- Skipping Test Shots: Always preview the camera’s feed post-install
Selecting the appropriate security camera mount system combines hardware elements to achieve peace of mind. A well-mounted security camera is a theft deterrent while recording clear video images and has an extended operational lifespan. The planning process stands superior to impromptu decisions in every situation when it comes to securing property, from business premises to residential apartments.
Final Pro Tip: Before deciding on your purchase, draw the layout plan of your property and mark down all areas that need protection, such as doors and windows, and spots where visibility is limited. The selection will lessen your expenses, time spent, and frustration.